Description
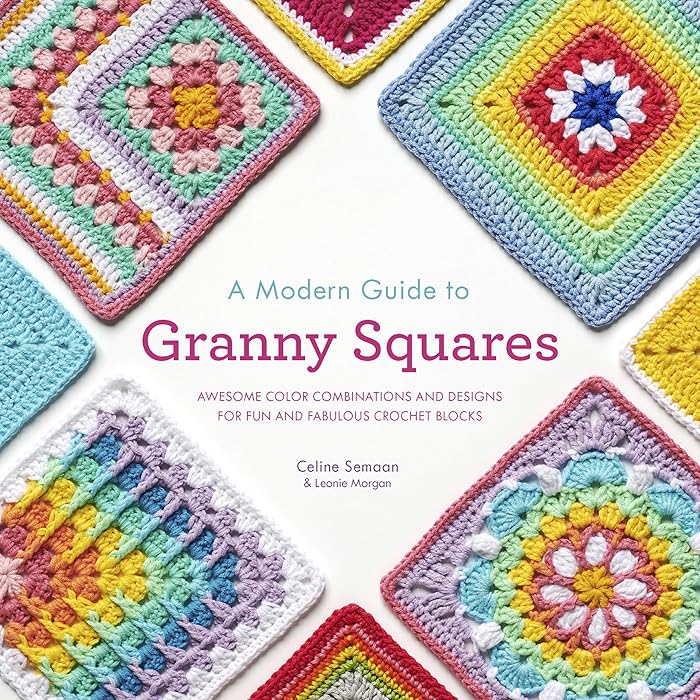
**A Modern Guide to Granny Squares**
Granny squares are a classic crochet technique that have evolved into a modern trend, offering endless creative possibilities. These small, square motifs, traditionally used in blankets, now appear in clothing, accessories, and home decor, allowing for personalized designs and bold color combinations. Whether you’re a seasoned crocheter or a beginner, granny squares are a fun way to express creativity while learning the basics of crochet.
### 1. **What is a Granny Square?**
A granny square is a motif typically made of yarn, worked in rounds from the center outward. Each round is made with a combination of chain stitches, slip stitches, and double crochet (US terms), creating a textured square. The simplicity of its design allows for a wide range of creative possibilities.
### 2. **Basic Granny Square Pattern**
Here’s a simple step-by-step guide to creating a traditional granny square:
#### Materials:
– Yarn (choose any thickness; worsted weight is ideal for beginners)
– Crochet hook (match the size to your yarn, usually a 5mm hook for worsted weight)
– Scissors
– Yarn needle
#### Instructions:
1. **Start with a Magic Circle:**
Create a magic circle (also known as an adjustable ring) by wrapping the yarn around your fingers, then pulling the yarn through to form a loop.
2. **Round 1:**
– Chain 4 (counts as the first double crochet).
– Make 2 more double crochets into the magic circle.
– Chain 2.
– Make 3 more double crochets into the circle.
– Chain 2 again.
– Repeat this twice to create four sets of 3 double crochets with chain 2 spaces in between.
– Pull the yarn tail to tighten the circle and join the round with a slip stitch into the top of the initial chain-4.
3. **Round 2:**
– Slip stitch into the next chain-2 space, then chain 3 (counts as the first double crochet).
– Make 2 more double crochets into the same chain-2 space.
– Chain 2, then make 3 more double crochets into the same chain-2 space.
– Move to the next chain-2 space and repeat the process (3 double crochets, chain 2, 3 double crochets) in each chain-2 space.
– Join the round with a slip stitch into the top of the starting chain-3.
4. **Round 3 and beyond:**
Continue adding rounds by repeating the process of crocheting 3 double crochets in each chain-2 space, separated by chain-2 spaces, until the square reaches the desired size.
5. **Finishing:**
When you reach the desired size, fasten off by cutting the yarn and pulling it through the final loop. Weave in all ends with a yarn needle.
### 3. **Modern Variations on Granny Squares**
While traditional granny squares use simple, solid colors and basic motifs, modern interpretations of granny squares often include:
– **Bold Color Choices:** Think bright, contrasting colors, gradients, and ombre effects.
– **Unique Shapes:** Granny squares don’t have to be square! Triangles, hexagons, and circles are all possibilities.
– **Textured Patterns:** Use different crochet stitches (shells, bobbles, popcorns) to add texture to the squares.
– **Joining Methods:** Modern crocheters experiment with different joining methods, such as whip stitch, slip stitch, or even the invisible join, for a seamless look.
– **Granny Square Clothing:** Use granny squares to create garments like cardigans, dresses, or vests, often adding a contemporary twist with unique color placements or even combining them into larger patchwork designs.
### 4. **How to Join Granny Squares**
Joining granny squares is an essential skill for creating larger projects. Here are three popular methods:
1. **Whip Stitch Join:**
– Place two granny squares right sides together.
– Using a yarn needle and matching yarn, whip stitch through both squares’ corresponding edges.
– Continue until the squares are joined. This method gives a visible seam.
2. **Slip Stitch Join:**
– Place the squares together, aligning their edges.
– Use a crochet hook to join with slip stitches along the edge, creating a smooth, invisible join.
3. **Join As You Go (JAYG):**
– This technique involves crocheting squares and joining them simultaneously. As you work the final round of the granny square, you join the square to the adjacent one by crocheting through both.
### 5. **Creative Uses for Granny Squares**
Granny squares are highly versatile and can be incorporated into numerous projects. Some popular modern uses include:
– **Blankets & Throws:** Combine multiple granny squares to make a colorful, cozy blanket. Choose complementary colors or create a gradient effect.
– **Pillows & Cushions:** Small, intricate granny squares can create striking pillow covers.
– **Garments:** Designers use granny squares to make cardigans, tank tops, dresses, and even jackets.
– **Bags & Accessories:** Granny square bags, totes, and purses are stylish and functional, adding a handmade touch to your wardrobe.
– **Wall Hangings & Home Decor:** Large granny squares can be used for wall art or rugs, with modern patterns creating a statement piece for your home.
### 6. **Tips for Successful Granny Squares**
– **Consistent Tension:** Try to keep an even tension throughout to ensure your squares are uniform in size.
– **Block Your Squares:** After finishing your squares, lightly steam or block them to make sure they hold their shape.
– **Experiment with Yarn Types:** Try using different yarn weights (sport, worsted, bulky) or fibers (cotton, wool, acrylic) to achieve different textures.
– **Stay Organized:** If you’re making a large number of squares, keep them organized by color and size to make assembly easier.


Reviews
There are no reviews yet.